Aligned Elements Web Client User Manual
3.1.272.24402
3.1.272.24402
  • Introduction
  • Basic Concepts
  • Get Started
    • Activate your Aligned Elements Account
    • Log In
    • Open a Project
    • Change Project
    • Create a new Project
    • The Project Start Site
    • Your Assigned Items
    • Manage Your User
    • Log Out
    • Enter Design Control Items
      • Work with Chapters
      • Work with Table Attributes
      • Inserting Images in Attributes
      • Working with Traces
      • Add Issues
      • Add Attachments
      • Collaborate using Comments
      • Favourites
      • Find in... Actions
      • Inconsistencies and Positive Cues
  • Document Object Actions
    • Move and Rearrange Chapters and Document Objects
    • Update Multiple Items
    • Generate Design Control Items
    • Copy Design Control Items
    • Lock Document Objects
    • Generate Reports
    • Export Document Objects
    • Import Document Objects
    • Copy Document Objects between Projects
    • Import Files
  • Explorers and Views
    • Project Explorer
    • File Explorer
    • Trace Explorer
    • Test Run Explorer
    • Project History
    • Chapter View
    • List View
    • Search Result View
    • Export to Excel in Grids
  • Project Status
    • Display Inconsistencies
    • Display Consistency Coverage
    • Display Risk Summary
    • Display DHF Index
  • Queries
    • Run a Query
    • Design a Query
    • Query Filters
  • Charts
    • Display a Chart
    • Design a Chart
  • Trace Tables
    • Run a Trace Table
    • Design a Trace Table
  • Work with Documents
    • Adding Word Document to File Objects
    • The Word Add-in. Adding Design Control Items to Documents
    • Sign Documents with Electronic Signatures
    • Save Files to Disk
    • Released Document View
  • Design Reviews
    • Conduct a Design Review
  • Risk Analysis
    • Perform a FMEA Risk Assessment
    • Perform a Preliminary Hazard Analysis
    • Relative vs. Absolute Mitigations
    • Potential Hazard
    • Using the Risk Analysis to assess the Software Safety Classification
  • Manage Tests
    • Test Runs
      • Planning a Test Run
        • The Burndown Chart
      • Executing a Test Run
      • Completing a Test Run
      • Test Run Functions
      • Test Runs and Linked Projects
      • Caching of Test Runs and Test Run Explorer
    • Classic Tests
  • Work with Tags
    • Add Tags
    • Filter views on Tags
    • Edit Tags
    • Tags and Snapshots
  • Assistants
    • Run an Assistant
  • Snapshots
    • Create a Snapshot
    • Display a Snapshot
    • Compare Snapshots
  • Settings
    • Project Information
    • Manage Users
    • Manage User Groups
    • Project Settings
    • Project Hierarchy
      • Branch Projects
      • Merge Projects
    • Unlock Objects
  • Dashboards
    • Select a Dashboard
    • Create a Dashboard
    • Remove a Dashboard
  • AI Features
    • AI Features in Aligned Elements
  • Aligned Elements Automation Tool
    • The Automation Tool
  • Web Administrator Tools
    • Manage Projects
    • Rename, Copy or Remove Project
    • Manage Users
    • Manage Permissions
    • Register a new Administrator
    • Inspect User Logs
    • Manage Templates
    • Download Log Files
  • Manage Service Configuration
  • Configure a Type Name Change
Powered by GitBook
On this page
  • How to add an Attachment to a Document Object
  • Add a new Attachment to a Document Object
  • Preview on Mouse Hover on Image Attachments
  • Add an existing Attachment to a Document Object
  • Remove an existing trace to an Attachment
  1. Get Started
  2. Enter Design Control Items

Add Attachments

PreviousAdd IssuesNextCollaborate using Comments

File attachments are a handy way to add additional or supportive information to a Document Object; e.g., log files as objective evidence for test executions, marketing survey data for requirements, or drawings for specifications. In Aligned Elements, Attachments are separate Document Objects that contain a File. They are added to the parent Document Object with help of a trace.

A File is uploaded to the Attachment by using the browse button in the Attachment Document Object Form. Once uploaded, you can click on the file name of the attached file to download and display the file. You can also use the dropdown actions to Rename the file or remove (Clear) the selected file.

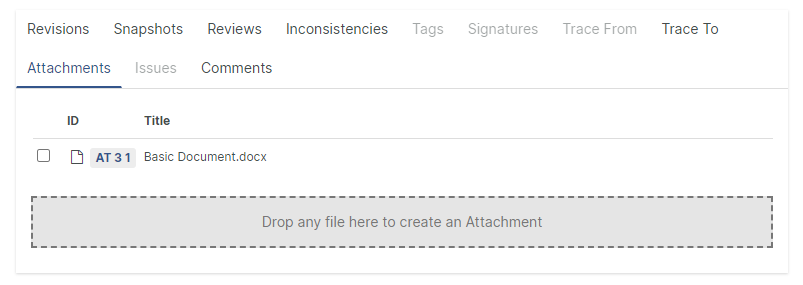
Already added Attachments are displayed in the Attachment tab in the Document Object form with ID and title. Click on an Attachment ID to navigate to it.

Note! It is possible to refer to already added Attachments by settings a trace to them.

How to add an Attachment to a Document Object

Open a Document Object in either read or edit mode.
Add a new Attachment to a Document Object

Use the Actions button to select Add Attachment... in order to add a new Attachment to the Document Object. An Attachment form is displayed. Fill out the fields and use the browser button in the dialog to upload your Attachment.
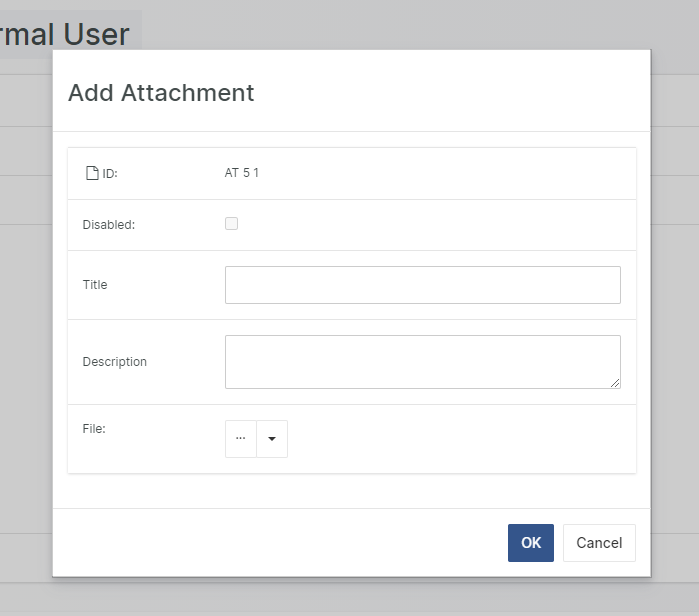
Close the dialog to add the Attachment to the parent object. The new Attachment will be automatically traced from the Document Object and will appear in the Attachment tab in the Document Object form.

Preview on Mouse Hover on Image Attachments

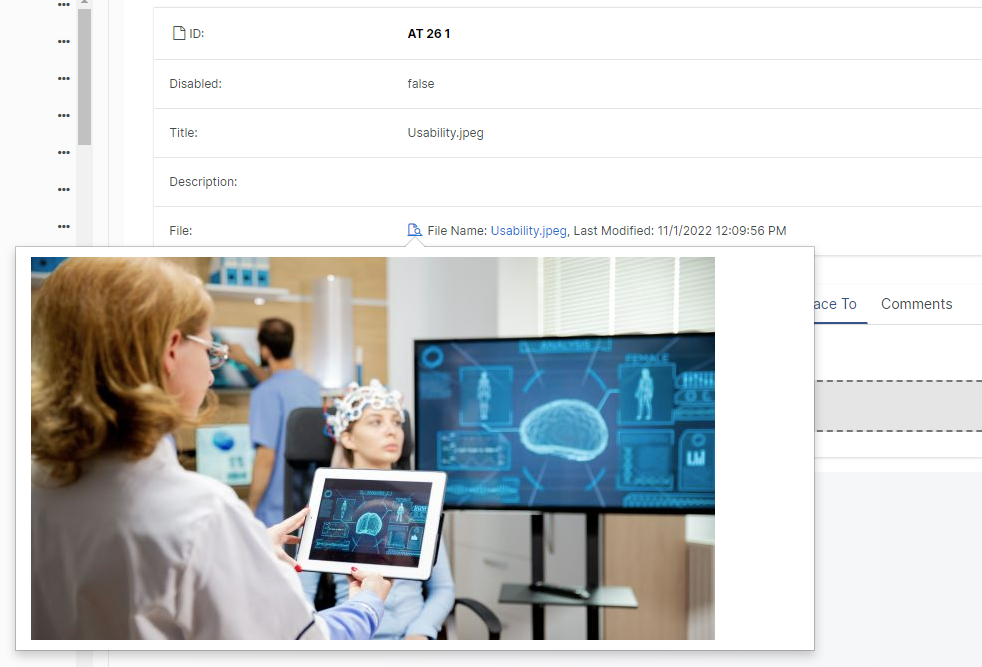
If the attached file is an image, use the mouse and hover over the preview icon in the File Attribute to get a popup containing a preview of the attached image file.
Add an existing Attachment to a Document Object

Use the Actions button to select Trace To... and select the Attachment type name in the subsequent dialog. In the resulting Attachment list, select the Attachment to which you want to trace.

Remove an existing trace to an Attachment

Use the Actions button to select Trace To... and select the Attachment type name in the subsequent dialog. In the resulting Attachment list, deselect the Attachment to which you want to remove the trace.

Note! Removing the trace to an Attachment does not disable/delete the Attachment.