
Work with the Rich Text Attribute
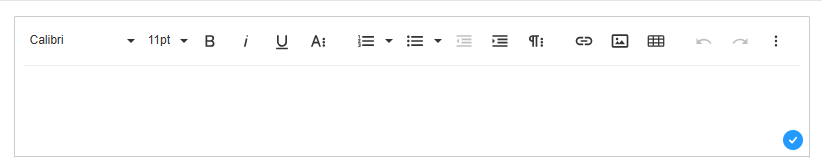
The rich text attribute provides an editor that allows you to create and format text, insert images and links, and organize content easily. This guide explains the most common toolbar options.
Fonts
The Rich Text Attribute is configured to show a default font and font size when creating a new object.
Use the font and font size control to use a different font.
Basic text formatting
Bold (B): Makes selected text bold. Shortcut:
Ctrl + B(Windows) /Cmd + B(Mac)Italic (I): Makes selected text italic. Shortcut:
Ctrl + I/Cmd + IUnderline (U): Underlines the selected text. Shortcut:
Ctrl + U/Cmd + U
Advanced text formatting
Click on the [A] icon to access advanced text formatting:
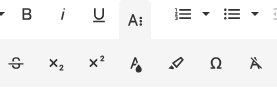
Strikethrough (S): Draws a line through the text.
Superscript: Raises selected text above the normal line (e.g., x²).
Subscript: Lowers selected text below the normal line (e.g., H₂O).
Text Color: Change the color of selected text.
Background Color: Highlight text with a background color.
Special Characters: Add symbols or special characters.
Clear formatting: remove any text formatting from the selected text
Ordered/Numbered Lists
Creates a list with numbers. Default is using normal numbers.
Use the dropdown to get access to number variants.
Use the tab key to start sub lists.
How to start a numbered list at a selected number
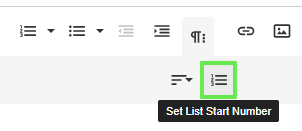
Click the 'More Paragraph' dropdown and access the control for 'Set List Start Number' to start a list with a different number than 1. This is useful when interspersing a list with e.g. images and tables.
Unordered Lists
Creates a list with bullets. Use the dropdown to access bullet variants.
Indentation
Use the indentation buttons to increase or decrease the indentation of a text.
Text Alignement
Click the 'More Paragraph' dropdown and access the control for text alignment.
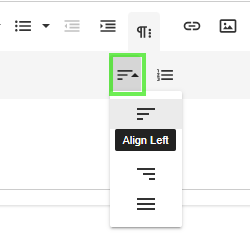
Align Left: Aligns text to the left margin.
Align Center: Centers the text.
Align Right: Aligns text to the right margin.
Justify: Aligns text evenly across the width of the page.
Hyperlinks
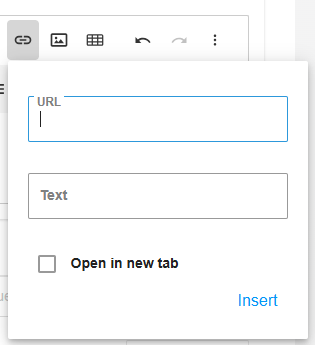
Use the hyperlink control to insert hyperlinks. You can set the URL and choose whether it opens in a new tab.
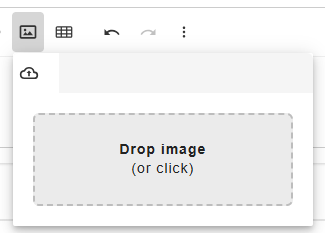
Insert Image
Insert an image using copy/paste or click the image icon in the toolbar to upload an image.
Edit an Image
It is possible to move an image using drag and drop. Note! drag and drop does not shift image alignment.
Click on an image to edit it. It is possible to resize the image by pulling in the blue corners on the image border.
Access the Edit Image toolbar by clicking on the image.

Use the Edit Image toolbar to:
Replace the image
Set horizontal image alignment
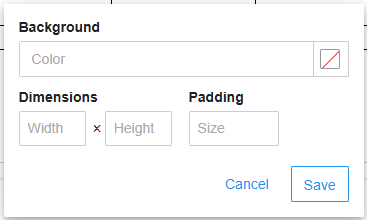
Change Image size
Set an image border
Add an image caption below the image. Note that the text alignment of the caption is the same as the image horizontal alignment.
Remove the image
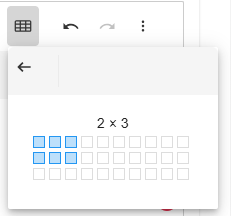
Insert a Table
Use the tool bar Table dropdown to set the size of the table you intend to insert.
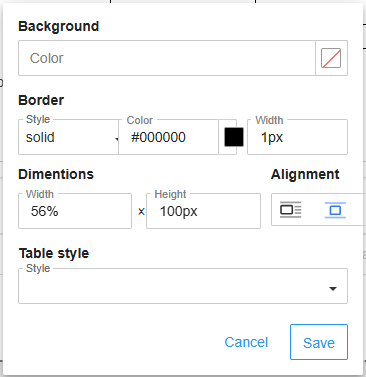
Align a Table
When created, a table is aligned in the middle (center).
To change the alignement, use the Table Properties:
Click on the table to access the table edit toolbar

Click on Table properties

In the section Alignement, select a different Alignment option.
Edit a Table
It is possible to pull the column dividers to change the size of a column or change the size of the table.
Tab in the last cell to add a new row.
Click in the table to access the table edit toolbar.
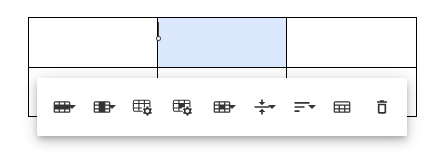
Use the Table Edit Tool bar to:
Perform row operations
Perform column operations
Set Table properties
Set Cell properties
Set cell border width
Set vertical alignment of cell content
Set horizontal alignment of cell content
Add a table caption above the image. Note! the horizontal alignment of the caption is the same as the horizontal alignment for the table.
Remove the table
Undo
Click to undo the latest operations.
Redo
Click to redo the latest undone operations.
Help / Shortcuts
See available shortcuts.
Code view
See the underlying html code for the rich text.
Last updated